🎉 Bring Your Joy-Con Back to Life!
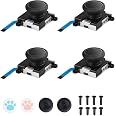
The Veanic 2-Pack Replacement Joystick Analog Thumb Stick Repair Kit is designed for Nintendo Switch, Switch Lite, and Switch OLED models. This high-quality OEM kit includes essential tools like the Y1.5 screwdriver and pry tools, allowing you to fix common joystick issues such as drift and dead zones. Weighing just 2.08 ounces and compactly packaged, this kit is a cost-effective solution to restore your gaming experience without the need for a pricey new controller.
| Brand | Veanic |
| Hardware Platform | Nintendo Switch |
| Item Weight | 2.08 ounces |
| Package Dimensions | 6.69 x 3.74 x 0.75 inches |
| Color | Black |
| Manufacturer | Veanic |
| ASIN | B07MRJ12HX |
| Is Discontinued By Manufacturer | No |
| Date First Available | January 1, 2019 |
J**
Cheaper than the alternative.
Super easy to do, took me maybe 30 mins while watching a YouTube video stopped and started a couple times. Only installed one, had some stick drift when first testing out the joy stick. (Did not calibrate at the time) But seemed to go away after a little bit, will be paying close attention incase I have to return them. Will update if needed but over great little kit for the price VS buying a whole new joycon. Tools were good too!
C**E
Good kit
Great kit my daughters Nintendo switch lite had a joystick break off and I was going to fix it but she want to do it herself and this made it all possible
A**R
Easy to swap and works great 👍🏼
Super quick and easy to switch out I was a little worried I'd need some YouTube 101 classes on how to switch them out but I honestly did this as I was cooking dinner for my family took 10 min at the most and I had never done it before
X**3
Great kit and good parts, but did not work for me
This is a really nice kit, but it did not work for me. I believe the part blew my mother board altogether and now my precious $150 Zelda controllers are dead. Because of the quality this company provided overall and because I think they are selling legit parts, I would absolutely buy from here again.Just because my kit didn’t work doesn’t mean it won’t work for others. I’m not faulting the company because these things can be fickle and they provided a really nice kit. It included the screw drivers and other parts needed. These are not high end screw drivers, but they are really good for the price point. They work smoothly and they fit the screws precisely. At the end of the day that’s what you want. I actually thought about keeping the kit just for the drivers. I think the value the company is giving is exceptional. It’s a shame it didn’t work for me and it’s a shame I lost my Zelda controllers.The actual install is fairly easy. I have worked on plenty of other electronics and I have been inside switch controllers before. If you have not opened a switch controller before, at least watch a video first. You need to be careful when opening the shell because the wires can break easily. Switch controllers are a much smaller space and board than other electronics.There is no soldering required for this. You just need to carefully open the controller housing and then very carefully disconnect a few wires which are all plug and play. You need to move and disconnect the battery. I actually found this to be the hardest part. I’m not sure what double sided tape brand Nintendo uses in their official products but it grips like a beast. Gentle and careful movements wins the day here. You might want a magnifying glass, a good light, and tweezer. Those things should be laying around the house for most people. It’s easy to break the cables because they are small, so I’d recommend getting some tweezers made for working with circuit boards. You will need to carefully open the clips holding the cables in place. You don’t want to damage the board or break it, so precision and gentle touch is key.Well done on the product and packaging. This shipped very quickly. Things like this happen in the maker space, so I don’t think there is need to destroy a company on reviews or make assumptions that may not be true. I think it was a great product overall. If I had bought this in a batch, I probably would never have noticed or cared because I expect a certain number of parts to be faulty with a batch. In all good measure, I should have order several of these anyways, but I was not thinking about it when I ordered originally.Buyers need to be aware that many electronic parts like this are pulled from devices that are out of commission and repackaged. In fact, many of us will buy old and broken systems for the parts. This happens in any space that uses electronics (appliances, vehicles, computers). I don’t see anything wrong with this approach (its Recycling and that’s a good thing), it does incur certain risk of higher part failure. I personally don’t care if the part is used, as I’m informed when I buy it. With that said - I have opened up other controllers, including official Nintendo and the Chinese made knock offs to compare them to these parts. The parts I got from this company seemed legit and new. I believe they are sending OEM parts or at least higher grade new parts. Because of this, I would buy these again.Because of the quality this company provided overall and because I think they are selling legit parts, I would absolutely buy from here again.
A**R
Great value for a perfect replacement, I highly recommend this product! Careful with the tri wing!
First of all, the included 00 tri wing screwdriver is too sharp, so either file it down to make it a bit more blunt or use a trusted tri wing screwdriver. Although I was careful, one of the screws is stripped and stuck, luckily after installing. It’s closed back up enough but still sticking out a bit. I’m probably gonna need a dab of superglue to get that screw out. The other three screws are in good shape, minor metal scrape, but next time I’m gonna use a better tri wing screwdriver. Now, onto the reviewI studied up on YouTube on how to replace the joysticks, I highly recommend reading and watching how to do it. It’s not that hard and I’m not a pro, but it’s easy enough once you know which screws to take out and where the ribbon cables are to avoid ripping. However like I mentioned, be very careful with the included tri wing screwdriver! In my excitement I rushed the last screw when putting the joy con back together, and now it’s stuck in place in the middle because the sharp point of the tri wing stripped the screw head. The philips head screwdriver worked fine for the inside of the joycon, but I’d still be careful. Another quick note, the ribbon cable on the stock joystick has a bit of a bend, and to be consistent and make sure everything fits like normal I bent the new joystick’s ribbon cable GENTLY to make the same shape. Overall, the installation was easy and quick since I had the process studied.After installing (and trying to get the stripped screw out in hopes of using one of the supplied replacement screws) I started up my switch and went straight to the controller settings. First I tested the input buttons to make sure every button was working as they should. Next I went into the calibration setting for the joystick. In a perfect world, you shouldn’t need to calibrate new joysticks or even new joycons. However, I’ve seen a few fresh out of the box needing calibration. The one new joystick I installed needed calibration, it didn’t fully reach the edge of the test circle. After the calibration, it works PERFECT. Like I said, in a perfect world you shouldn’t have to check the calibration of new joysticks and joycons, but you do have to. It’s quick, so just do it. So now with the new joystick working smoothly let’s talk appearance and feel of these joysticks.The joystick itself is identical in size and appearance, I had them next to each other to visually compare, and pressed them against each other after removing my old joystick to measure. They’re identical, which is great. The new joystick feels good. Compared to the stock joystick it might be just a bit springy, as in releasing the joystick from the edge and back to neutral. Otherwise feels the same and how a joystick should be. It rotated smooth and and just feels good to not have a drifting stick anymore. The joystick button press is also identical. Same click tension and depression. Again, it just feels good that it’s new.I’ve only just installed these so durability is unknown. But given the feel, I think it will last just as long as the stock joystick. I play docked mostly with a pro controller, so my joysticks already lasted this long from when the switch released. But now that I know how to replace the joysticks, I’m confident that stick drifting and faulty joysticks will never be a problem!This two pack of joysticks and tool kit saves a ton of money, and kept my original joycons alive! But don’t forget, the included tri wing screwdriver is too sharp! File it down, use a trusted tri wing screwdriver, or risk stripping a screw! I can’t replace the screw with the supplied replacement screws, if I can’t get it out!Great value and perfect replacement. I highly recommend this product!
M**X
Fixes the controller drift.
It actually worked! My Nintendo Joycons were pretty much not usable because of the drift on both left and right controllers. These parts worked great. They did take some careful removal, but if you don't mind taking it apart, it is worth it. The alternative was throwing the drifting controllers away, so might as well give it a try.
S**T
Works so far!
So far so good. I had really bad left joycon drift. Sent the joycons to Nintendo for “cleaning” or whatever and literally made no difference. I got this yesterday and changed out the joy sticks and so far its been great no issues. No more drift! It’s only been 1 day so hopefully it lasts but so far I am very pleased. Did not come with instructions but I just used a youtube video.
Trustpilot
5 days ago
1 month ago