


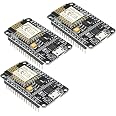
KeeYees 3pcs ESP8266 ESP-12E Development Board WiFi WLAN Wireless Module CP2102 for NodeMCU for ESP-12E for Arduino
Details
- BrandKeeYees
- Model NameESP8266
- Connectivity TechnologyWi-Fi
- Included Components3 x Board
- Operating SystemLua

Description
🚀 Code fast, connect faster—your WiFi dev just got a triple upgrade!
- TRIPLE POWER PACK - Get 3 modules in one pack—scale your prototypes or projects instantly.
- FAST WI FI DEPLOYMENT - 802.11b wireless tech ensures your smart network ideas go live in a flash.
- ALL IN ONE CONNECTIVITY - GPIO, PWM, IIC, 1-Wire, and ADC integrated for versatile IoT projects.
- NODE MCU ARDUINO READY - Plug-and-play with popular platforms using modern LUA firmware.
- SEAMLESS USB PROGRAMMING - No more button mashing—flash your code effortlessly via CP2102 interface.
The KeeYees 3pcs ESP8266 ESP-12E Development Board pack offers three compact, 5V-powered WiFi modules featuring integrated GPIO, PWM, IIC, ADC, and a CP2102 USB interface for easy programming. Compatible with NodeMCU and Arduino, these modules leverage 802.11b wireless standards and LUA OS to accelerate IoT and smart networking projects with minimal setup.

Specifications
| RAM | LPDDR3 |
| Wireless Type | 802.11b |
| Brand | KeeYees |
| Series | ESP8266 ESP-12E |
| Item model number | 8541549622 |
| Operating System | Lua |
| Item Weight | 1.06 ounces |
| Product Dimensions | 1.89 x 1.01 x 0.51 inches |
| Item Dimensions LxWxH | 1.89 x 1.01 x 0.51 inches |
| Color | Pack of 3 |
| Processor Brand | Espressif |
| Number of Processors | 1 |
| Voltage | 5 Volts |
| Manufacturer | KeeYees |
| ASIN | B07HF44GBT |
| Is Discontinued By Manufacturer | No |
| Date First Available | September 16, 2018 |
Have a Question? See What Others Asked
Reviews
S**G
Perfect for home automation
These things are great. There's a few available GPIO pins and one analog pin. They have more flash than some other versions, so I was able to put a whole web server with OTA updates where my friend's ESP8266 couldn't run it due to lack of memory.
J**H
Tiny, impressive, inexpensive wifi boards. Penny for size.
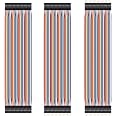
This is my first time buying anything like this. I'm doing a small project involving an 8x8 LED matrix and running a server on the ESP8266. There are lots of code examples on the internet. I have already successfully connected to my local wifi. It is nice that this comes with 3 boards even though I'm not using all of them because I'm a beginner and could potentially screw something up. Also, the cost is surprisingly low considering what these can do.Here are the steps I took to get this thing up and running:- Download and install Arduino IDE (running it on Mac OS Catalina)- Download and install the driver (Please see the back of the dev board which specifies the correct driver to download. Just Google search for it).- Download the ESP8266 board library- Plug in the ESP8266 via micro USB (this provides the 3v power required. No other power source needed).- Write code and compile/upload it via the Arduino IDE. Note: I ran into an issue where python3 was not found during compile time. I had to install it via homebrew and even then I was still having issues. I recommend googling troubleshooting steps if you have this issue. I eventually resolved the issue by adding something to my bash_profile.- The code you upload will instantly execute as soon as the upload is finished. Anything you place in setup() will run once before anything else runs. Anything in loop() will keep executing over and over after setup runs. This is the common pattern for Arduino boards.Recommendation: Get a breadboard and some jumper wires which makes it much easier to connect components to the ESP8266.
N**K
Worked well but consider ESP 32 instead
Love these boards for ease of use and access to so many more pins than the common ESP-01. Being able to program directly via USB is a huge bonus, no level shifters or pushing buttons. No problems programming with either the Arduino IDE or VS Code/PlatformIO.Wifi works well and easy to set up using the WifiManager library.Consider this a huge step up from Arduino in terms of capacity and speed with the bonus of built in wifi.Prefer that the pins not be soldered (drop a star). They are hard to remove and maybe one device gets stuck in a breadboard but real projects need wires soldered which means removing the pins.Final thought: great for the price but given the number of ESP-32 devices now available for not more, I would probably pay a little extra for a much more powerful device.
T**B
Works with micropython, but needs flash check
Couldn’t get Thonny to flash the boards. I tried ESPTool manually and had issues until I manually checked the flash size and accommodated during install.It’s 4MB btw, didn’t see any mention of that on the product page. After that install with the latest full size micropython firmware was a breeze
L**N
Size and Wi-Fi Capability Awesome
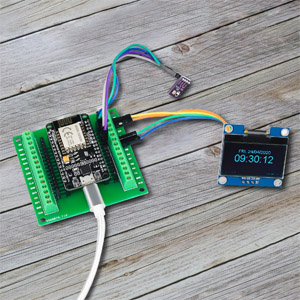
I recently learned how to connect a variety of different types of inexpensive sensors to a NodeMCU ESP8266 and use its Wi-Fi capabilities to transmit sensor information to other Wi-Fi connected operating systems like Android and Windows etc. These little NodeMCUs are awesome and have been very reliable. I have used at least a dozen of them in different small hardware projects. None of these MCUs have failed yet. Some of the projects that I have used them in include:1. Use a motion sensor to automatically turn my desk fan on and off when I sit down or leave my desk area. That project used NodeMCU, heat sensor, relay, fan, lcd display2. Use a DC volt sensor and NodeMCU to send messages to my cell phone when my car battery is weak. That project used DC voltage senso, NodeMCU, IFTTT technology to get text msg to my cell phone.3. Use switch and NodeMCU to send message to my cell phone when yard gate is opened and closed.4. Used weight scale sensor with NodeMCU to weight items ranging from cotton ball to bowling ball.5. Used Text-to-Speech module with NodeMCU to create a Voice Server so my various NodeMCU projects can use Wi-Fi to send messages to the Voice Server to speak.6. Use temperature probe and NodeMCU to create a thermo logger that records temperature changes on a microSD memory card and can transmit the temperatures in a web page etc.It is fun and fairly easy to create a variety of different types of smart switches using different sensors, relays and these NodeMCU ESP8266 chips.
B**N
solid built 8266 12-E boards
These 8266 12-5 Node-EMCU boards are a great buy for the price. These allowed me to get a few IoT projects off the ground. As I get deeper into the project I am looking into switching to the V1 8266 boards as they are smaller and would probably be more then sufficient for this project.The Pros -These boards are easy to set up, configure, and get working for ESP-8266 projects.Easy to use, headers already installed.The Cons -The board seems with be missing a clear layout guide. The top and bottom have different pin names.I was able to figure it out but a clearer pinout on the board would be helpful.Over all I would recommend these boards for anyone looking to get into Ardunio and or IoT projects that require wifi.
W**D
Cool Board - Check Your USB Cable
Took me a while to figure out that the USB cable I was using wasn't compatible. After installing PlatformIO CLI (command line) tools and running "pio device list" on my Mac, I didn't see anything that looked like it might be the right device. After trying a few USB cables, a device named "CP2102 USB to UART Bridge Controller" starting showing up in the device list. This little board uses the CP2102 bridge from Silicon Labs, evidently. OS X Monterey has those drivers so it all worked as soon as I had the right cable. I loaded Visual Studio Code with the PlatformIO extension and was coding in no time. Looking forward to doing some cool home automation work with MQTT and IFTTT.
Common Questions
Trustpilot
1 day ago
2 weeks ago
Get the App
