


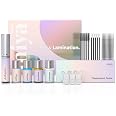
Brow Lamination Kit | Professional Eyebrow Lamination with Keratin | DIY Brow Lift Kit | Fuller, Thicker Brows for 6 weeks | Includes Easy to Use Instruction, Treatment Tools & Brushes
Details
- BrandMIYA LASH
- Item FormLotion Serum
- ColorMulticolor
- Finish Typeflawless shine
- Special FeatureLong Lasting

Description
✨ Wake up to your dream brows every day!
- 6 WEEKS OF FLAWLESS BROWS - Enjoy fuller, thicker, and perfectly shaped brows that last up to 6 weeks without daily makeup.
- EFFORTLESS GLAMOUR AT HOME - DIY brow lift kit with easy-to-follow instructions for salon-quality results.
- NOURISHING GENTLE FORMULA - Infused with keratin and chamomile to strengthen hair and soothe skin during treatment.
- COST EFFECTIVE BEAUTY UPGRADE - One kit covers 6 treatments, saving you hundreds compared to professional salon prices.
- TREND SETTING BROW PERFECTION - Achieve the coveted supermodel feathery brow look that instantly lifts and frames your face.
The MIYA LASHBrow Lamination Kit is a professional-grade DIY eyebrow lamination system enriched with keratin and chamomile. It delivers fuller, thicker, and perfectly lifted brows that last up to 6 weeks, saving you hundreds of dollars compared to salon treatments. The kit includes all necessary tools and easy instructions, allowing up to 6 treatments per kit, making it a cost-effective and nourishing solution for flawless brows.


Have a Question? See What Others Asked
Reviews
E**Z
It works!
I have naturally very curly hair, which translates to my eyebrows as well. I used it for the first time about 48 hours ago and the difference is crazy! The relaxer STINKS so beware of that, otherwise I am extremely happy with this purchase and will continue to laminate my brows at home from now on.
A**Z
Does it job!
It does it job, just don’t be like me and actually set a timer :) I forgot and over did it so they were too curled (I actually liked them over done) 😂
A**R
Fantastic results and simple steps
My first lamination was done at the Anastasia counter in Ulta. The appointment was long, the results were mediocre, and it cost me as much as my mani & pedi combined. So I never went back. But after seeing the tiktok girlies doing it at home, I decided to give it a try. I'M IN LOVE WITH MY RESULTS!I did some research to get helpful tips that werent included in the instructions, and they worked for me:1. The adhesive dries quickly so work fast with it.2. Use two pieces of plastic wrap, one for each brow. Not one single piece.3. To secure the plastic wrap, use your finger to tap it over your brows. Make sure none of the hair lays funny under the plastic wrap.....this could give you weird results.4. If you use any products with retinol, aha, bha, or the like, stop using them a few days prior to doing your lamination. Otherwise your skin is vulnerable to having a bad reaction.After my lamination, I also tinted my brows, but let my brows sit with the nourishing oil for a few minutes first. Instead of using water to rinse the tint dye, I used a cotton pad with body oil.My results are salon quality for half the price and hassle. I highly recommend this kit.
S**Y
Great product, its worth the money
Great product!
M**N
Lifting solution is a hardened solid - unusable
The lifting solution came solid and hard in the kit making it unusable. This happened with another brow lamination kit I ordered and was hoping this would be different given the good reviews.
J**.
Better than my brow girl
I LOVE this kit! It has everything you need (minus plastic wrap) and is really easy to follow the instructions. I also found some YouTube videos of people using this kit so that was helpful.I usually pay like $100 for this plus tip with my lash and brow tech. I’m pretty good at this kind of things so I decided I wanted to try to save some $$ and do it myself, and this kit did not disappoint!It was MUCH more gentle than whatever my lash/brow girl uses - no stinging or chemical burns. I will say I use Tretinoin daily and I stopped using it on the top half of my face 5 days leading up to doing this because I think that was part of the problem last time. My brow tech should have known that - the kit has a card in it that’s says as much. But ANYWAY…I paired the lamination with the Refectocil brown tint in light brown.Couple tips: I found using a spooly with the adhesive was easier than using the y “brush” which is just a plastic comb because it does set pretty quickly. Make sure you get the adhesive right (don’t be afraid to redo it) because that’s the shape your brows will be stuck in. I tried to use the y brush first and had to redo the adhesive on one brow (I used the nutrition oil to break down the adhesive then cleansed again and redid the adhesive) before I used the lifting and setting lotions.Because I tinted mine as well i used the y brush to get the adhesive off after I finished laminating them so I could then use the tint. I added the nutrition oil after the tint.Highly recommend for the price!
S**N
"You get what you pay for" situation
I got sick of paying over $100 every month to laminate my brows so I gave this a try. IT'S HARD but I'm sure it gets easier with time. Here's what I learned, if it's helpful to anyone:*Additional needed supplies*- Plastic wrap and cotton balls -*! Things I wish I knew beforehand !*1. When people say they “didn't realize the adhesive (step one) dries so fast“ - they don't mean your brows will be stuck in place immediately. What they mean is you're essentially putting Elmer's glue on your eyebrows and if you try to adjust anything, you'll end up with rolled up glue balls all over your applicator and face. If you mess this part up then it's basically going to stay messed up because the more you adjust, the less will re-stick. It's a one and done IME.2. Don't use the plastic "Y" BRUSH tip part EVER because it will just rip your brows out.3. Google "when" during this process you're supposed to dye and/or trim your brows (maybe just after?). I still have no idea so I just mostly didn't for now 😂.4. Be chill. Literally. If you get nervous you'll heat up and potentially sweat.5. If your brows don't stay up before going under the plastic wrap, you can slightly adjust them by reaching under a tiny section with a tiny applicator tip.6. All of the tiny bottles have additional plastic plugs under the caps that are a bit tricky to remove7. The setting lotion will not be sticky, and it won't help get the brows back in to place after wiping the previous goo off as instructed. WIPE UPWARD ONLY.*Issues I ran in to*1. Adhesive didn't stick enough, and my eyebrows wanted to escape from it but like I said you can't really re-apply the adhesive. At all.2. I had dyed my brows with Just For Men about a week prior, and I thought it was gone but the cleanser proved me wrong. It will take any dye right off of your skin and hair. Idk if that had an impact on how this worked overall.3. The adhesive failed even worse when I got to step two, and the lotion substance seemed to just remove the adhesive which made the battle to get the plastic wrap on even harder. I may have used too much lotion - but yes it was the right stuff.4. I started getting anxiety at this point and the plastic wrap made my forehead sweat a bit. The first two steps had already not gone super well, though.Soooo that's all I have hahah. Best of luck. First photo is before/after/V.S Salon. Second photo is left/right. If I have something important coming up, I'll likely visit the salon. Until then I'll keep trying. Maybe I'll update.
Common Questions
Trustpilot
1 month ago
3 days ago
